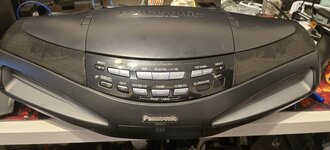
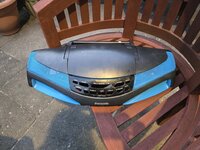
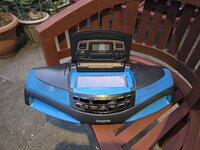
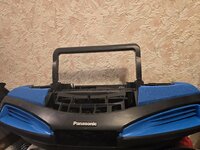
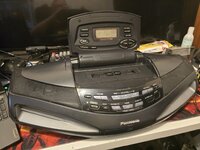
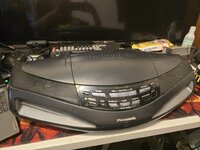
I know this doesnt have the same allure and style of a 80's boombox but i remember when it came out when I was in school and i thought the motorised top was the coolest thing ever.
So when i got one for free with broken tape decks i couldnt say no.
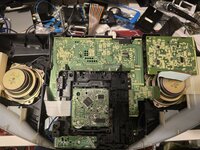
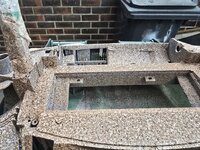
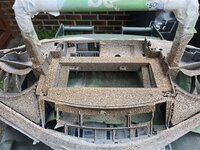
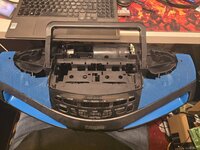
However two problems, when I say broken i mean destroyed, someone had tried to fix them in the past and just wrecked it to the point where i would have to find another one of these to pull the mech out of that and the system and then do the belts and it just isnt worth it, I will be salvaging whatever parts I can from the ruined deck to sell on cheap and doesn't have an Aux-IN
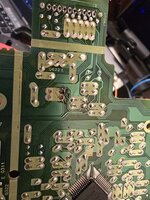
So the first step was finding where Audio can be fed in, with some help from this forum and the wiring diagram I found that it looked like you could tap into the MIC input
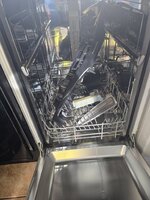
The next step was to disassemble it and test that theory and success, I was able to feed an input from my desktop DAC into the input. The next step was to clean it as it had a good 15 or so years of dirt and finger grease - if my wife asks i did NOT use the dishwasher for that task.
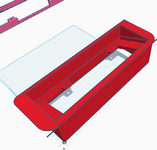
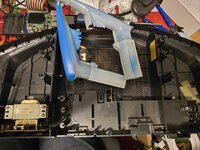
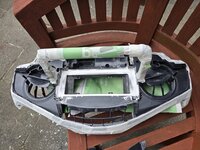
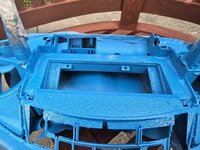
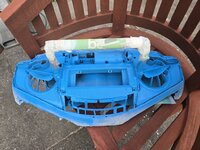
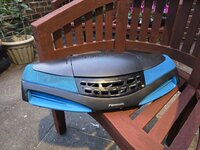
While it was in pieces i wanted to jazz it up a bit so i sprayed the speaker ports and the speaker grills into blue and then sprayed a metallic flake lacquer over it
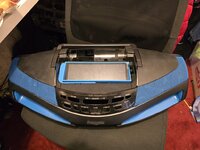
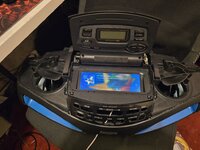
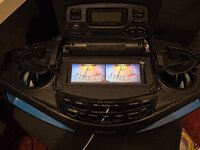
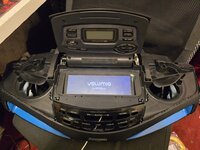
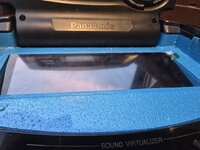
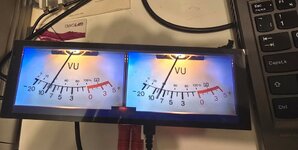
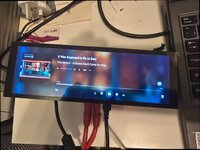
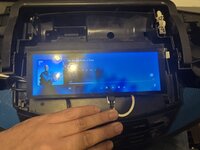
So what is the plan for the broken tape deck area. Well what i have in these pictures are is a RaspberryPi running volumio, it is connected to a 7.9inch widescreen display and a Pi-DAC. for a test fit is almost perfectly fits in the space the tape decks took
In testing this i was feeding it into my home stereo (Cyrus Pre amp, Cyrus power amp per speaker and a pair of 40 year old hand-built speakers) and it sounded bloody good.
The next steps are to
-Design a 3d printed bracket to hold the screen in the location the tape decks were and get it printed
-Cut the plastic for the tape deck to give me the dept the mount the Screen/Pi/DAC sandwich
-Install the 3d printed bracket. I think this will be a case of fitting and car body filler to make it look smooth and OEM
-Tidy up the bodge wires on the main board for the aux in
-Measure up and make some posts to support the main board replacing the ones lost from the tape mech removal
So when i got one for free with broken tape decks i couldnt say no.
However two problems, when I say broken i mean destroyed, someone had tried to fix them in the past and just wrecked it to the point where i would have to find another one of these to pull the mech out of that and the system and then do the belts and it just isnt worth it, I will be salvaging whatever parts I can from the ruined deck to sell on cheap and doesn't have an Aux-IN
So the first step was finding where Audio can be fed in, with some help from this forum and the wiring diagram I found that it looked like you could tap into the MIC input
The next step was to disassemble it and test that theory and success, I was able to feed an input from my desktop DAC into the input. The next step was to clean it as it had a good 15 or so years of dirt and finger grease - if my wife asks i did NOT use the dishwasher for that task.
While it was in pieces i wanted to jazz it up a bit so i sprayed the speaker ports and the speaker grills into blue and then sprayed a metallic flake lacquer over it
So what is the plan for the broken tape deck area. Well what i have in these pictures are is a RaspberryPi running volumio, it is connected to a 7.9inch widescreen display and a Pi-DAC. for a test fit is almost perfectly fits in the space the tape decks took
In testing this i was feeding it into my home stereo (Cyrus Pre amp, Cyrus power amp per speaker and a pair of 40 year old hand-built speakers) and it sounded bloody good.
The next steps are to
-Design a 3d printed bracket to hold the screen in the location the tape decks were and get it printed
-Cut the plastic for the tape deck to give me the dept the mount the Screen/Pi/DAC sandwich
-Install the 3d printed bracket. I think this will be a case of fitting and car body filler to make it look smooth and OEM
-Tidy up the bodge wires on the main board for the aux in
-Measure up and make some posts to support the main board replacing the ones lost from the tape mech removal
Attachments
-
 20250510_202222.jpg89.5 KB · Views: 31
 -
 20250510_202444.jpg192.9 KB · Views: 21
 -
 20250510_200555.jpg119.1 KB · Views: 18
 -
 20250510_202554.jpg100.2 KB · Views: 19
 -
 20250505_214748.jpg210 KB · Views: 18
 -
 20250505_214039.jpg182.1 KB · Views: 17
 -
 20250502_181645.jpg155.1 KB · Views: 22
 -
 20250501_192928.jpg153.6 KB · Views: 21
 -
 20250501_192919.jpg125.3 KB · Views: 21