I've been a bit quite recently as I've been very busy creating Phase 1 of my Boom Room. It's a task I didn't find easy as it's not something I'm used to although I have worked with wood before and have basic 'DIY' skills but I didn't anticipate the blisters, broken nails, perspiration or stress involved but I got there in the end. 
Phase 1 consists of 4 deep shelves on one wall and 3 shallow shelves on the opposing wall in a room size of 3m x 2m/10' x 6.5' approximately. My first dilemma was a desire for shelving with no upright supports getting in the way or interrupting the visual flow of the display, this would also maximise usable shelf space. As the walls are made of some kind of grey composite material ('ash block'?) I needed to go way overboard on shelf supports as I'd selected a standard right-angle design with no bracing strut, the struts would have got in the way of my BB display.
First Job: Mark out the walls and drill all the holes for the supports making allowances for concealed electric wiring.
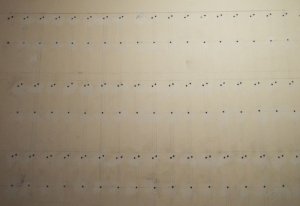
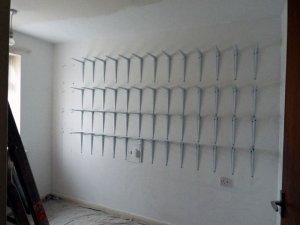
Next, paint the walls and then fit the brackets:
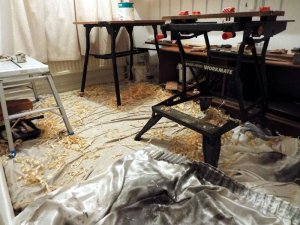
The next step was to make a nice cup of tea to calm myself down after I saw the mess I was making once the woodwork was started:
Woodwork being completed it was time for painting and this required 2 coats or primer/undercoat with 6 hours between coats then two top coats of satin gloss needing 4 hours between coats. Each coat took 3 hours to apply to all surfaces as it was an awkward space to manoeuvre long shelves around prior to them being fitted. To save time, I applied one coat of paint to all surfaces and then took time off to eat & sleep so this set the routine until all the painting was done.
Shelves were fitted to the supports, radios were displayed and another cup of tea was made by way of a celebration drink whilst I admired the fruits of my labours:
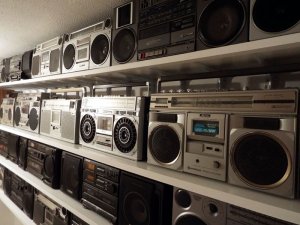
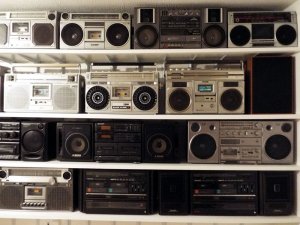
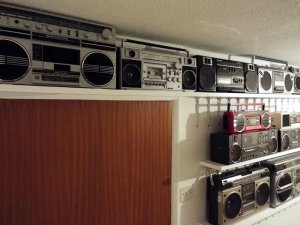
You can see more pics on this Dropbox link, just 'press to continue' when the pop-up log-in screen shows and you'll be taken to the pics. I could only squeeze 35 BB's on these particular shelves so I've also posted pics of some of my other boxer boxes on temporary shelves elsewhere. So far I have collected 53 BB's (excluding donor/parts boxes and this is the first time I've seen so many of my BB's on display at once. Phase 2, Phase 3 & Phase 4 of my BB display arrangements may be needed sooner than I thought! Sorry to disappoint the hardened BB veterans but I have no really big hitters yet, I need a little longer for this.
As well as the materials I had to invest in some tools so now I have these ready for the next phase and I'll post the details when this is ready. The big downside was the MESS! Saw dust and wood shavings I can cope with as gravity tends to leave these in a small area making a clean-up relatively easy but the fine grey dust from drilling the walls went all over the house even tough I kept doors closed so now it's a case of clean, clean, clean!
  All in all it took me the best part of three weeks to do this allowing for a couple of days rest and time for the blisters on my hands to disappear (twice).

Phase 1 consists of 4 deep shelves on one wall and 3 shallow shelves on the opposing wall in a room size of 3m x 2m/10' x 6.5' approximately. My first dilemma was a desire for shelving with no upright supports getting in the way or interrupting the visual flow of the display, this would also maximise usable shelf space. As the walls are made of some kind of grey composite material ('ash block'?) I needed to go way overboard on shelf supports as I'd selected a standard right-angle design with no bracing strut, the struts would have got in the way of my BB display.
First Job: Mark out the walls and drill all the holes for the supports making allowances for concealed electric wiring.

Next, paint the walls and then fit the brackets:

The next step was to make a nice cup of tea to calm myself down after I saw the mess I was making once the woodwork was started:

Woodwork being completed it was time for painting and this required 2 coats or primer/undercoat with 6 hours between coats then two top coats of satin gloss needing 4 hours between coats. Each coat took 3 hours to apply to all surfaces as it was an awkward space to manoeuvre long shelves around prior to them being fitted. To save time, I applied one coat of paint to all surfaces and then took time off to eat & sleep so this set the routine until all the painting was done.

Shelves were fitted to the supports, radios were displayed and another cup of tea was made by way of a celebration drink whilst I admired the fruits of my labours:


You can see more pics on this Dropbox link, just 'press to continue' when the pop-up log-in screen shows and you'll be taken to the pics. I could only squeeze 35 BB's on these particular shelves so I've also posted pics of some of my other boxer boxes on temporary shelves elsewhere. So far I have collected 53 BB's (excluding donor/parts boxes and this is the first time I've seen so many of my BB's on display at once. Phase 2, Phase 3 & Phase 4 of my BB display arrangements may be needed sooner than I thought! Sorry to disappoint the hardened BB veterans but I have no really big hitters yet, I need a little longer for this.
As well as the materials I had to invest in some tools so now I have these ready for the next phase and I'll post the details when this is ready. The big downside was the MESS!
 Saw dust and wood shavings I can cope with as gravity tends to leave these in a small area making a clean-up relatively easy but the fine grey dust from drilling the walls went all over the house even tough I kept doors closed so now it's a case of clean, clean, clean!
  All in all it took me the best part of three weeks to do this allowing for a couple of days rest and time for the blisters on my hands to disappear (twice).


