JVC PC-55 PC-550 LCD display - I'm declaring it irreparable

aiwapanasonic

Member (SA)
I have some more information in case someone has a spare deck to test on, plus good eyesight, precision soldering station etc, here on this thread:


Attaching the articles, plus a video where this type of fix is shown on a LCD clock - using conductive glue on the LCD and solder on the board.


I don't know about the 'ripping the existing connection points' problem - it seems some connection points can get loose, while the others are still attached hard so that's something to be solved.
 

Attachments

  • Repair of flexible film cable to LCD.pdf
    3.6 MB · Views: 2
  • Alarm key fob display repair.pdf
    2.6 MB · Views: 1

RoZyBoom

Member (SA)
...you know...I think if you put a second filter in front of this LCD, you'll reverse the polarization and invert the display positive/negative. That could be a cool thing to try.
 

Brutus442

Member (SA)
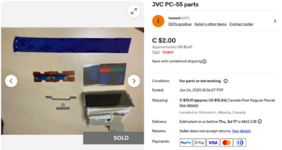
Were these replacement parts scavenged from a functioning 55 or an aftermarket rebuild/ replacement? It looks incredibly clean however I do know that the LED bulbs have a blue sheath covering them in order to give the green glow (from the pic, it looks like they have the cover). Very hard to remove and put back on without damaging them
 

RoZyBoom

Member (SA)
Were these replacement parts scavenged from a functioning 55 or an aftermarket rebuild/ replacement? It looks incredibly clean however I do know that the LED bulbs have a blue sheath covering them in order to give the green glow (from the pic, it looks like they have the cover). Very hard to remove and put back on without damaging them
I guess someone removed them from a unit and sold them.

As for removing the blue filter...
1. insert toothpick to lift it away from the glass a touch.
2. spray some window cleaner into the void
3. work it a bit so the window cleaner gets spread between the glass and filter and start pulling it off, and it slides off.

To put filter on a new bulb, spray some into the filter cylinder, rub spray overrun from your fingers onto new bulb, slide it on. Remember, work fast while everything is wet, once it dries off, you lose lubrication. Then let dry for a bit and you're good to backlight disco!
 

Brutus442

Member (SA)
I
I guess someone removed them from a unit and sold them.

As for removing the blue filter...
1. insert toothpick to lift it away from the glass a touch.
2. spray some window cleaner into the void
3. work it a bit so the window cleaner gets spread between the glass and filter and start pulling it off, and it slides off.

To put filter on a new bulb, spray some into the filter cylinder, rub spray overrun from your fingers onto new bulb, slide it on. Remember, work fast while everything is wet, once it dries off, you lose lubrication. Then let dry for a bit and you're good to backlight disco!
actually heated them up with a heat gun (from a distance) and rolled it off like a condom (insert silly smile) and while it was still warm, rolled them back on the new light.