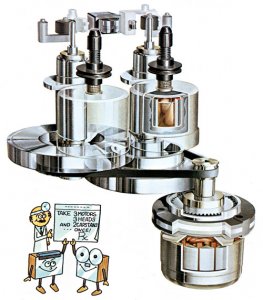
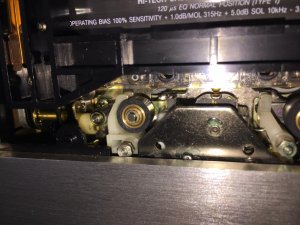
Several times I came across with hardened pinch rollers and spend lots of money and effort to replace them. I always thought there must be an easy way to restore these rubber parts.
My first approach was to find rubber tubes that match the size of the pinch roller and slip them on the top of the old bearing after removing the hardened rubber from it. Things are not easy because no matter how you clean and slip the rubber tube on top of the old bearing it will wobble and don't work well. The reason is that these tubes have uneven thickness.
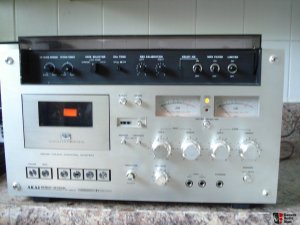
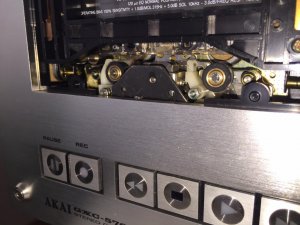
I had to make 2 pinch rollers for my Akai cassette deck. I checked for the replacement part and they go for ~$55 to $75.
I started to think where I can get the right size rubber tube for this pinch roller bearing.
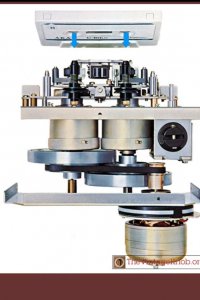
Recently I had to replace several hardened rubber pinch rollers on my boomboxes including GF9696 and all. It is such a pain to get the correct size pinch roller and also in many instances we cannot use the factory bearings that came with the deck when you replace them.
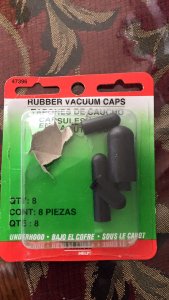
I went to hobby shops and auto parts store looking for nice rubber tubes that can be used for this application and finally found vacuum caps for this need. They come in different measurements. One has to mill it and glue it to the bearing after removing the old hardened rubber.
Caveman's lathe came handy!
On careful examination one can see that these rubber tubes are not even on thickness, so we need to mill it and shape it. If you just slip over the cleaned rubber bearing/wheel it will wobble when it moves with the tape pressed against the capstan. Not a good sight at all!
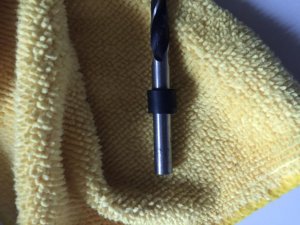
I used my drill as the lathe and the right size drill bit for the milling need.
Slipped the cut section of the tube on the back end of the drill bit. Then I glued 400 grit emery paper on a wooden ruler for the grinding.
You must have a clear understanding of the outer diameter that is needed when you slip it over the original bearing.
The emery paper stuck on the wooden ruler will slowly erase the hills on the tube and go down to the valleys.
I made 2 for my Akai GXC 570D and will make 2 more for the same deck I have.
I hope this method will help to keep the original wheels and replace just the rubber.
I used 2K epoxy for bonding the rubber and the metal wheel.
I will post pics soon.
~ Royce
My first approach was to find rubber tubes that match the size of the pinch roller and slip them on the top of the old bearing after removing the hardened rubber from it. Things are not easy because no matter how you clean and slip the rubber tube on top of the old bearing it will wobble and don't work well. The reason is that these tubes have uneven thickness.
I had to make 2 pinch rollers for my Akai cassette deck. I checked for the replacement part and they go for ~$55 to $75.
I started to think where I can get the right size rubber tube for this pinch roller bearing.
Recently I had to replace several hardened rubber pinch rollers on my boomboxes including GF9696 and all. It is such a pain to get the correct size pinch roller and also in many instances we cannot use the factory bearings that came with the deck when you replace them.
I went to hobby shops and auto parts store looking for nice rubber tubes that can be used for this application and finally found vacuum caps for this need. They come in different measurements. One has to mill it and glue it to the bearing after removing the old hardened rubber.
Caveman's lathe came handy!
On careful examination one can see that these rubber tubes are not even on thickness, so we need to mill it and shape it. If you just slip over the cleaned rubber bearing/wheel it will wobble when it moves with the tape pressed against the capstan. Not a good sight at all!
I used my drill as the lathe and the right size drill bit for the milling need.
Slipped the cut section of the tube on the back end of the drill bit. Then I glued 400 grit emery paper on a wooden ruler for the grinding.
You must have a clear understanding of the outer diameter that is needed when you slip it over the original bearing.
The emery paper stuck on the wooden ruler will slowly erase the hills on the tube and go down to the valleys.
I made 2 for my Akai GXC 570D and will make 2 more for the same deck I have.
I hope this method will help to keep the original wheels and replace just the rubber.
I used 2K epoxy for bonding the rubber and the metal wheel.
I will post pics soon.
~ Royce


")