Hi all.
This is a continuation of my first thread.
I decided to start a new one, as I found it more fitting to post it here.
After finding this treasure in the trash, and giving it a good basic clean, the only thing not working was the forward/rewind functions, so I had to source a new belt.
After a lot of research, I was pretty sure I had the right measurements of the four tape deck belts, but so far I have had no luck finding the main drive belt.
I decided to take it apart anyway, to see the condition of the belts, and maybe measure the lengths, just to make sure.
The factory manual came in handy (big thanks to the uploader to the library on this site!), but I also took a lot of pictures, and made drawings to keep track of the right place for all the various size screws. A shoebox was perfect for storing the long ones for the chassis")

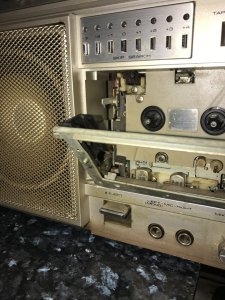
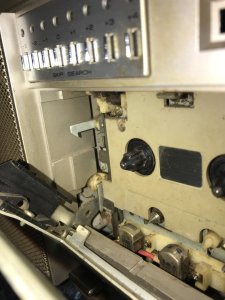
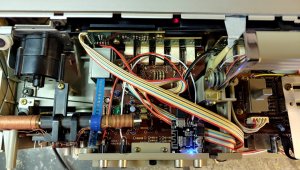
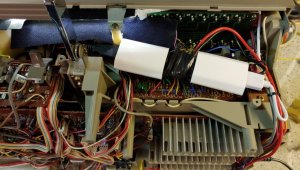
Taking it apart wasn't difficult, but I was surprised to see how cramped full it was, and by some of the odd design decisions. For example the tape speed can't be adjusted, while its assembled, and the pre amp board and logic board has to be taken out first to get to the motor. That means that my slightly fast run speed won't be adjusted for now, as I haven't got the gear to adjust it as a component. Oh well, I'll live with it.
It was obvious that it hadn't been taken apart before, or for a very very long time at least. Every screw gave that really good "pop" when they came loose. One of them was so fused to the plastic, that it took the thread out with it
Exploded view
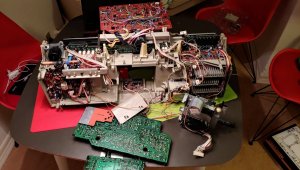
A smidge dusty in places
Overall everything looked really good, especially after a good vacuum, and a lot of careful wiping with a microfiber cloth/all porpose claner.
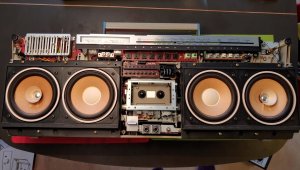
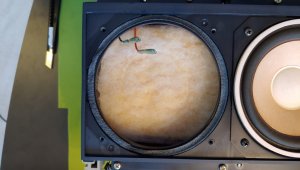
Only the "patinated" speakers are a bit of an eye sore, but after reading up on bleaching or painting the speakers, I decided to leave them alone, aside from vacuuming and cleaning them. I'm really tempted to paint them with acrylic paint, but there is no backing out, once you've started, and I think that it's just too much of a gamble. I'm sure I will make it look good, but it would be horrible if the sound changed, and I'm guessing it will.
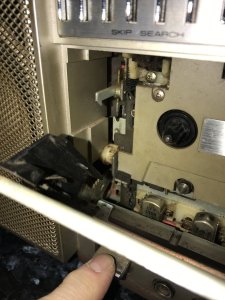
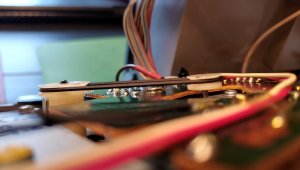
It was pretty obvious why the forward/rewind function didn't work though. A really dead belt, and rigor mortis had set in too
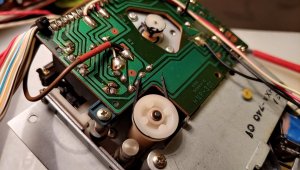
I got lucky again, and the other three belts looked fine. Only the counter belt was a bit loose, but it still worked fine, so I left it alone.
After measuring and calculating the length of the belt route, which confirmed the lengths I found on the net, I got a new belt with the approximately correct measurements at the local electronics shop. After a good black tar delete cleaning, it was installed, and was a really good fit.
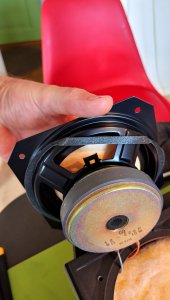
I more or less took it completely apart to clean it, and found a gasket installation error on the right speaker. I had noticed that the right speaker was a bit weak in the 62 - 90 Hz frequency range, so I wasn't surprised ... Nah, just kidding
With the steam from a hot iron, you know the ones you use to iron a shirt, and drying it with a hair dryer a few times over, I got it back to an acceptable reusable condition.
I assembled it all again, and everything worked like a charm
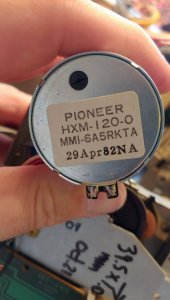
The tape search function buttons are really really cool! It must have been completely amazing in 1981 (mine is from 1982 btw.)
Next up, was a bit of modding. I have decided to keep it, and use it i on a daily basis as my kitchen radio. It just sounds too nice to be put away
on display somewhere. But to be a daily driver, it has to have Bluetooth capability, as I use that all the time. I have used it with a Bluetooth module connected to the AUX input already, and it works just fine. It doesn't look so sharp though, so I decided to integrate it, and solder the module directly to the AUX input.
The Bluetooth module is powered by micro usb (5v), so I had to find some way of powering it up. I thought about finding 5 volts somewhere on the boards, but even if I found 5v, I was unsure if could risk damaging something by drawing additional power. More on that later.
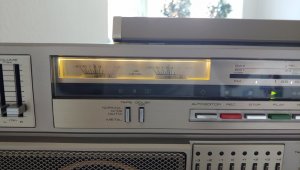
On top of Bluetooth, I wanted to light up the VU meters, as I really don't get why they weren't lit up from the factory. (was a 909L lit up? "L" for light, and 909F for f...all perhaps )
)
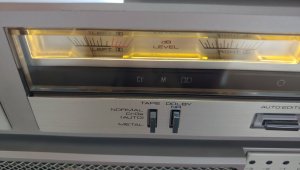
It seems like a missed opportunity to show off the coolest feature of this thing. Space is limited, so I was pretty sure I had to go for LEDs. I wanted to make it look as if it was like that from the factory, so if it had to be LED, they had to produce light with a warm temperature, like incandescent bulbs do (2700 kelvin). It was a big ask, and it turned out to be a lot more difficult than I thought!
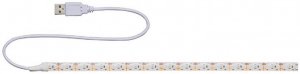
While shopping for a new belt in the local electronics store I also found this 30cm led LED strip (3200 kelvin - close enough) which was also USB powered.
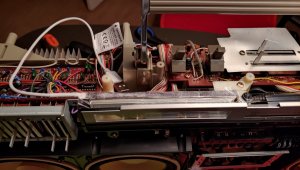
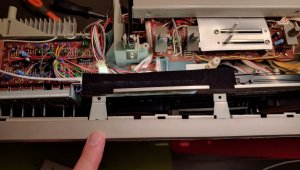
I cut the LED band down to the width of the VU meters, and clear taped them at an angle to the metal bracket holding the VU meters.
By installing them at an angle, I could make the LEDs shine directly against the metal bracket, meaning that only the sheen from the sides of the LEDs would go through to the VU meters. This made it much less obvious that the light came from 9 individual light sources.
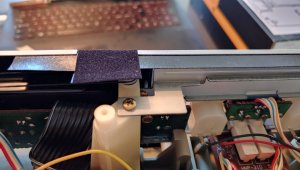
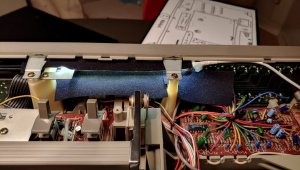
I had to mask off a lot, to block the light from going anywhere else than the VU meters. I used som self adhesive felt I had already, and after a lot of fettling, and trial and error,
it was as good as it was going to get.
I think I will give my self an 7,5 out of 10 for this, and I'm satisfied (enough) to let it stay. LEDs are hard to photograph, and although I got the color temperature pretty much correct in the photos, the individual LEDs are more visible than they are in real life, fortunately.

So, back to finding 5 volts from somewhere. I now needed to 2 x USB power sources, and speculated in getting a step down module, and install it neatly.
I then had another idea, which was not neat, but insted easy, and pretty much guarantied to work. I took two phone chargers, and soldered them together, and then connected them to 240V; one wire directly to the socket where the power cable goes, and the other one to a switchedd pin on the power switch, so the BT module and LED lights would only be on when the boom box was on.
This morning, I gave the last parts a good clean, and assembled everything again. I had a bit of a scare when I gave it a really good workout to a hefty dance tune, and it suddenly died I was afraid that I messed something up, but after a few minutes, it came back to life. I guess it has some sort of fail safe circuit. It went when I cranked it up to about 3/4 volume.
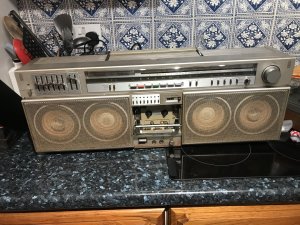
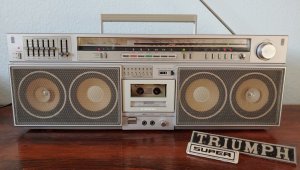
Here it is, back together in all it's glory. Nothing less than a Super triumph
This is a continuation of my first thread.
I decided to start a new one, as I found it more fitting to post it here.
After finding this treasure in the trash, and giving it a good basic clean, the only thing not working was the forward/rewind functions, so I had to source a new belt.
After a lot of research, I was pretty sure I had the right measurements of the four tape deck belts, but so far I have had no luck finding the main drive belt.
I decided to take it apart anyway, to see the condition of the belts, and maybe measure the lengths, just to make sure.
The factory manual came in handy (big thanks to the uploader to the library on this site!), but I also took a lot of pictures, and made drawings to keep track of the right place for all the various size screws. A shoebox was perfect for storing the long ones for the chassis
Taking it apart wasn't difficult, but I was surprised to see how cramped full it was, and by some of the odd design decisions. For example the tape speed can't be adjusted, while its assembled, and the pre amp board and logic board has to be taken out first to get to the motor. That means that my slightly fast run speed won't be adjusted for now, as I haven't got the gear to adjust it as a component. Oh well, I'll live with it.
It was obvious that it hadn't been taken apart before, or for a very very long time at least. Every screw gave that really good "pop" when they came loose. One of them was so fused to the plastic, that it took the thread out with it
Exploded view
A smidge dusty in places
Overall everything looked really good, especially after a good vacuum, and a lot of careful wiping with a microfiber cloth/all porpose claner.
Only the "patinated" speakers are a bit of an eye sore, but after reading up on bleaching or painting the speakers, I decided to leave them alone, aside from vacuuming and cleaning them. I'm really tempted to paint them with acrylic paint, but there is no backing out, once you've started, and I think that it's just too much of a gamble. I'm sure I will make it look good, but it would be horrible if the sound changed, and I'm guessing it will.
It was pretty obvious why the forward/rewind function didn't work though. A really dead belt, and rigor mortis had set in too
I got lucky again, and the other three belts looked fine. Only the counter belt was a bit loose, but it still worked fine, so I left it alone.
After measuring and calculating the length of the belt route, which confirmed the lengths I found on the net, I got a new belt with the approximately correct measurements at the local electronics shop. After a good black tar delete cleaning, it was installed, and was a really good fit.
I more or less took it completely apart to clean it, and found a gasket installation error on the right speaker. I had noticed that the right speaker was a bit weak in the 62 - 90 Hz frequency range, so I wasn't surprised ... Nah, just kidding
With the steam from a hot iron, you know the ones you use to iron a shirt, and drying it with a hair dryer a few times over, I got it back to an acceptable reusable condition.
I assembled it all again, and everything worked like a charm
The tape search function buttons are really really cool! It must have been completely amazing in 1981 (mine is from 1982 btw.)
Next up, was a bit of modding. I have decided to keep it, and use it i on a daily basis as my kitchen radio. It just sounds too nice to be put away
on display somewhere. But to be a daily driver, it has to have Bluetooth capability, as I use that all the time. I have used it with a Bluetooth module connected to the AUX input already, and it works just fine. It doesn't look so sharp though, so I decided to integrate it, and solder the module directly to the AUX input.
The Bluetooth module is powered by micro usb (5v), so I had to find some way of powering it up. I thought about finding 5 volts somewhere on the boards, but even if I found 5v, I was unsure if could risk damaging something by drawing additional power. More on that later.
On top of Bluetooth, I wanted to light up the VU meters, as I really don't get why they weren't lit up from the factory. (was a 909L lit up? "L" for light, and 909F for f...all perhaps
)It seems like a missed opportunity to show off the coolest feature of this thing. Space is limited, so I was pretty sure I had to go for LEDs. I wanted to make it look as if it was like that from the factory, so if it had to be LED, they had to produce light with a warm temperature, like incandescent bulbs do (2700 kelvin). It was a big ask, and it turned out to be a lot more difficult than I thought!
While shopping for a new belt in the local electronics store I also found this 30cm led LED strip (3200 kelvin - close enough) which was also USB powered.
I cut the LED band down to the width of the VU meters, and clear taped them at an angle to the metal bracket holding the VU meters.
By installing them at an angle, I could make the LEDs shine directly against the metal bracket, meaning that only the sheen from the sides of the LEDs would go through to the VU meters. This made it much less obvious that the light came from 9 individual light sources.
I had to mask off a lot, to block the light from going anywhere else than the VU meters. I used som self adhesive felt I had already, and after a lot of fettling, and trial and error,
it was as good as it was going to get.
I think I will give my self an 7,5 out of 10 for this, and I'm satisfied (enough) to let it stay. LEDs are hard to photograph, and although I got the color temperature pretty much correct in the photos, the individual LEDs are more visible than they are in real life, fortunately.
So, back to finding 5 volts from somewhere. I now needed to 2 x USB power sources, and speculated in getting a step down module, and install it neatly.
I then had another idea, which was not neat, but insted easy, and pretty much guarantied to work. I took two phone chargers, and soldered them together, and then connected them to 240V; one wire directly to the socket where the power cable goes, and the other one to a switchedd pin on the power switch, so the BT module and LED lights would only be on when the boom box was on.
This morning, I gave the last parts a good clean, and assembled everything again. I had a bit of a scare when I gave it a really good workout to a hefty dance tune, and it suddenly died
I was afraid that I messed something up, but after a few minutes, it came back to life. I guess it has some sort of fail safe circuit. It went when I cranked it up to about 3/4 volume.Here it is, back together in all it's glory. Nothing less than a Super triumph
Last edited:
") . I think you're right about their design. It's very stringent,and well thought out.
. I think you're right about their design. It's very stringent,and well thought out.