I just bought one of these with tape deck issues and this is some great advice! Hope I can get it to play and record tapes smoothly with a proper belt and new capstan roller. 8.3 right?
New project, GE 5259a tape repair
- Thread starter jasatc77
- Start date
You are using an out of date browser. It may not display this or other websites correctly.
You should upgrade or use an alternative browser.
You should upgrade or use an alternative browser.
Like Bill mentioned the sound quality issue is due to a bad pinch roller. The rubber on the pinch roller got hardened and is not catching the tape pressed when against the captain. If the rubber is not looking that bad, gently sand it in play mode without a tape - taking extra care not to rub on any other parts except the pinch roller rubber. I would roll a 400 grit emery paper on a thin tongue depressor wood piece or an ice cream handle and hod it against the pinch roller and make it slightly rough.
If the rubber is so hard, then we might have to replace it. Hardened rubber won't grab the tape and will cause distorted sound.
A new pinch roller would make a world of difference.
If the rubber is so hard, then we might have to replace it. Hardened rubber won't grab the tape and will cause distorted sound.
A new pinch roller would make a world of difference.
My Blockbuster tape transport won't go up all the way, I found a black plastic piece broken where a spring attaches to it. Anyone know where I can get a replacement or if there's a fix for this? I tried gluing it but it broke again. please help!

JB weld is only way to repair these and the realistic scr8 decks.Gizmo said:My Blockbuster tape transport won't go up all the way, I found a black plastic piece broken where a spring attaches to it. Anyone know where I can get a replacement or if there's a fix for this? I tried gluing it but it broke again. please help!
JB weld is only way to repair these and the realistic scr8 decks.
Not for long.....
")


Last edited:
nice work Eric, I'm pretty sure there is a thread which shows this issue in more detail, it would be better to get that unlocked and added to that thread.
Found it here - Blockbuster deck spring issue
Found it here - Blockbuster deck spring issue
Thanks fellas yeah I had to post here because of the lock, too bad there isn't a "request to unlock" button at the end of those threads.
Are you close to making these yet? I could use oneNot for long.....
I've currently got my Blockbuster apart trying to figure out how much space I have to add extra material to the area of concern. It's not a lot of space so I have to take some time to figure that out, but I plan on having a sample to check for fit in a few weeks.
Material added (in blue and green) while avoiding the cover plate (in purple) and clip (in red).
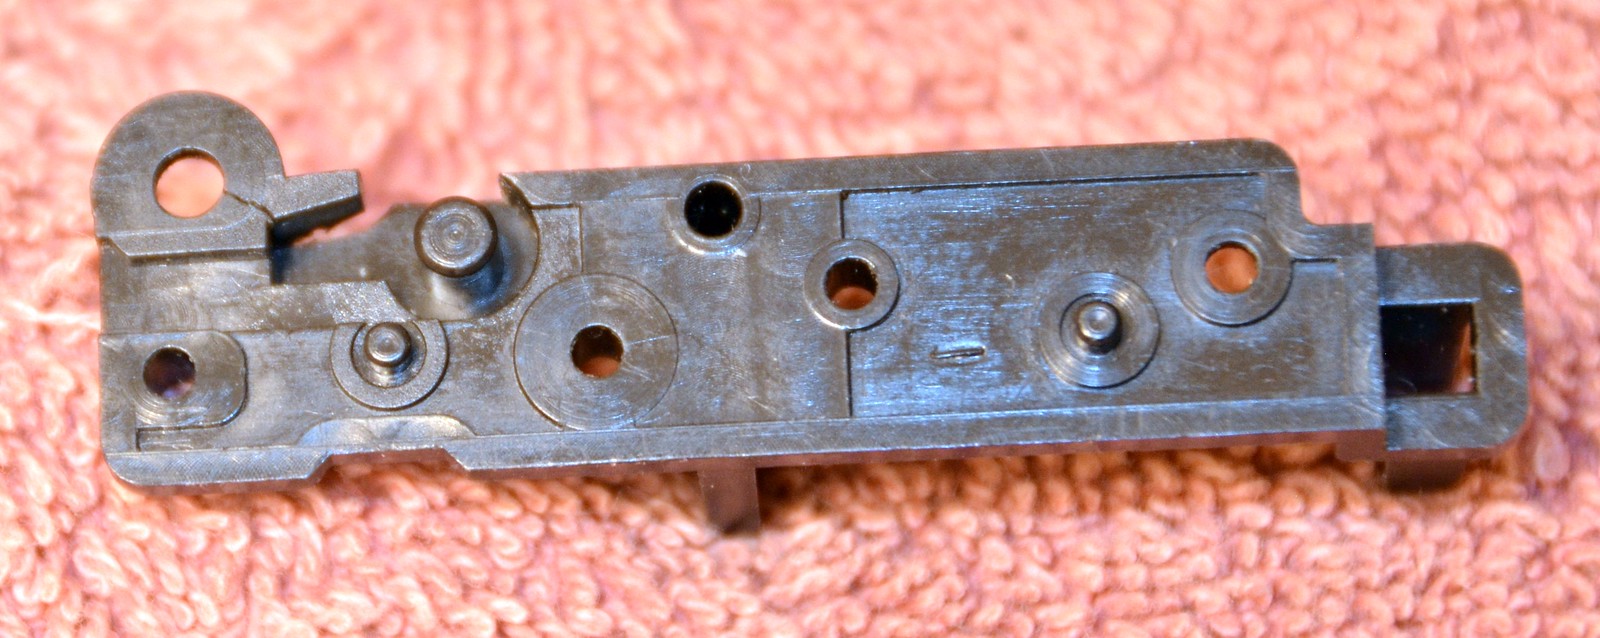
Some pics of the deck, heads up, tape present, to show the limited space available.
The crack happens along the top, between the screw pocket and that gap for the spring's coil, so I tried to close that gap. I got 50% across and ran into the coil's space (in yellow), and you can't go up and around because the clip in front of the head sits right above that part of the gap.
Now we wait for a printed part to arrive in the mail
My deck works despite a cracked part. A prior owner bent up the end of the spring a little bit, but they also put wire insulation on the spring, filling the channel. So, with the coil tension gone, the "squishiing" of the insulation provides a similar amount of give to make it work.

Yep! Well, close enough that I could install it and have a functioning deck. The carriage moves up and down as designed. I pushed the heads up by hand and exercised the spring, and it feels solid.
I'm currently waiting for the corrected version to arrive, in about a week. One of the anchor pins that sticks into the plate was off by a bit, so I had to snip it flat. You can see it in the first pic. It's not critical, after all there's five screws and the second anchor post, but it needed to be corrected. I used the wrong overall length (52.4 vs. 54.2mm) when positioning it.
As I was fixing that, I improved a few other areas, including the position of the spring pin. It was 0.1mm too low, and its pocket was 0.3mm too low. Raising the pocket opened a larger gap along the top, but it's now closer to original. Even though I removed a little bit of material where it abuts the gap for the coil, it should still be plenty strong.


Here are the original (yellow) and updated (blue) versions overlaid.
Some changes are hard to see without two images, so each part's color can dominate the common surfaces individually.


I'm currently waiting for the corrected version to arrive, in about a week. One of the anchor pins that sticks into the plate was off by a bit, so I had to snip it flat. You can see it in the first pic. It's not critical, after all there's five screws and the second anchor post, but it needed to be corrected. I used the wrong overall length (52.4 vs. 54.2mm) when positioning it.
As I was fixing that, I improved a few other areas, including the position of the spring pin. It was 0.1mm too low, and its pocket was 0.3mm too low. Raising the pocket opened a larger gap along the top, but it's now closer to original. Even though I removed a little bit of material where it abuts the gap for the coil, it should still be plenty strong.
Here are the original (yellow) and updated (blue) versions overlaid.
Some changes are hard to see without two images, so each part's color can dominate the common surfaces individually.
If anyone needs one, here's the link:

 www.shapeways.com
GE 3-5259 & Realistic SCR-8 boombox head bracket by AnalogAlleycom on Shapeways
Check out GE 3-5259 & Realistic SCR-8 boombox head bracket by AnalogAlleycom on Shapeways and discover more 3D printed products in Mechanical Parts.